Step 1: Open the Google Chrome Switchyomega extension from here. |
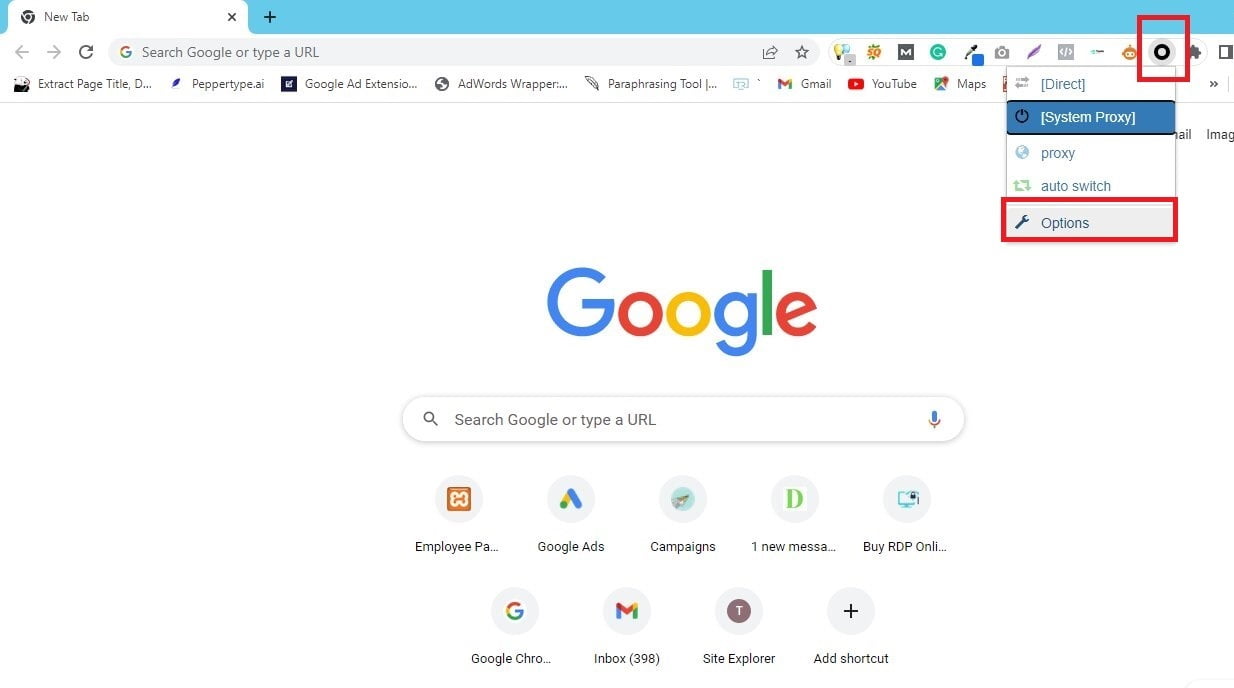
Step 2: Click on the SwitchyOmega icon in your browser and click on Options. |
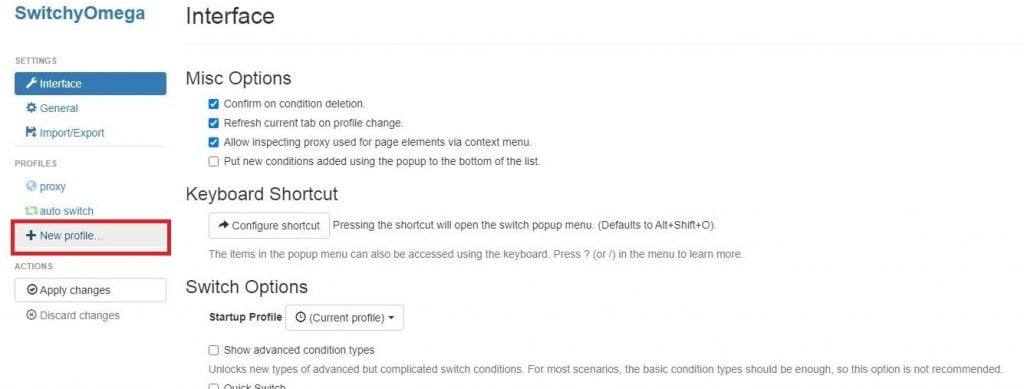
Step 3: Click on the New profile option and create profiles. |
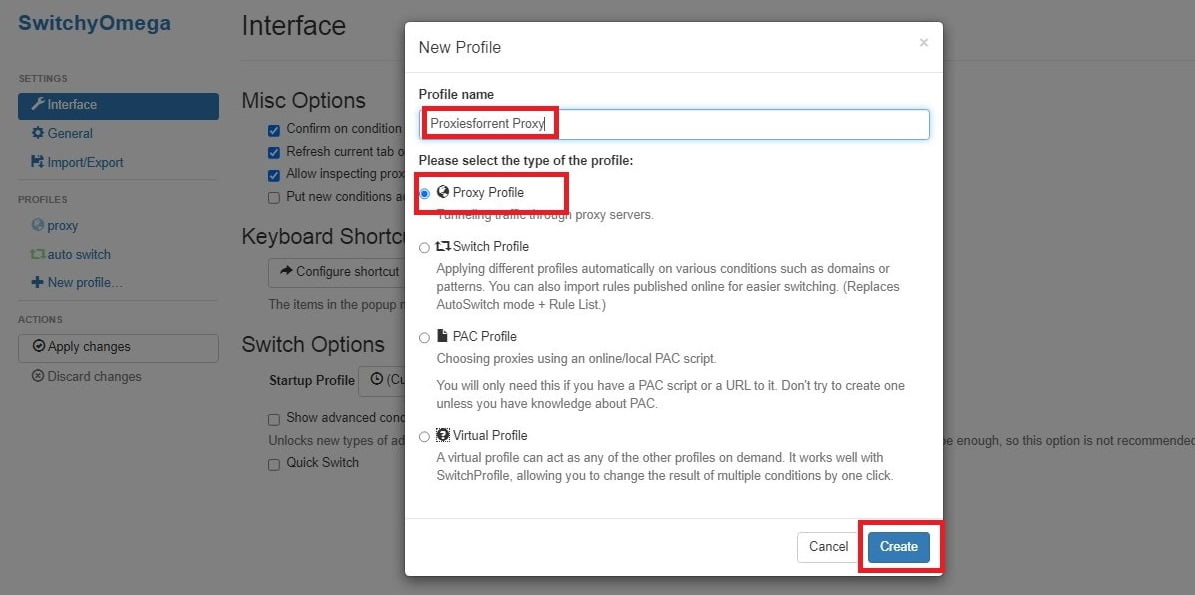
Step 4: Now a popup window will open under Profile name write down the name you want to give. Click on Proxy Profile Option and hit the Create button. |
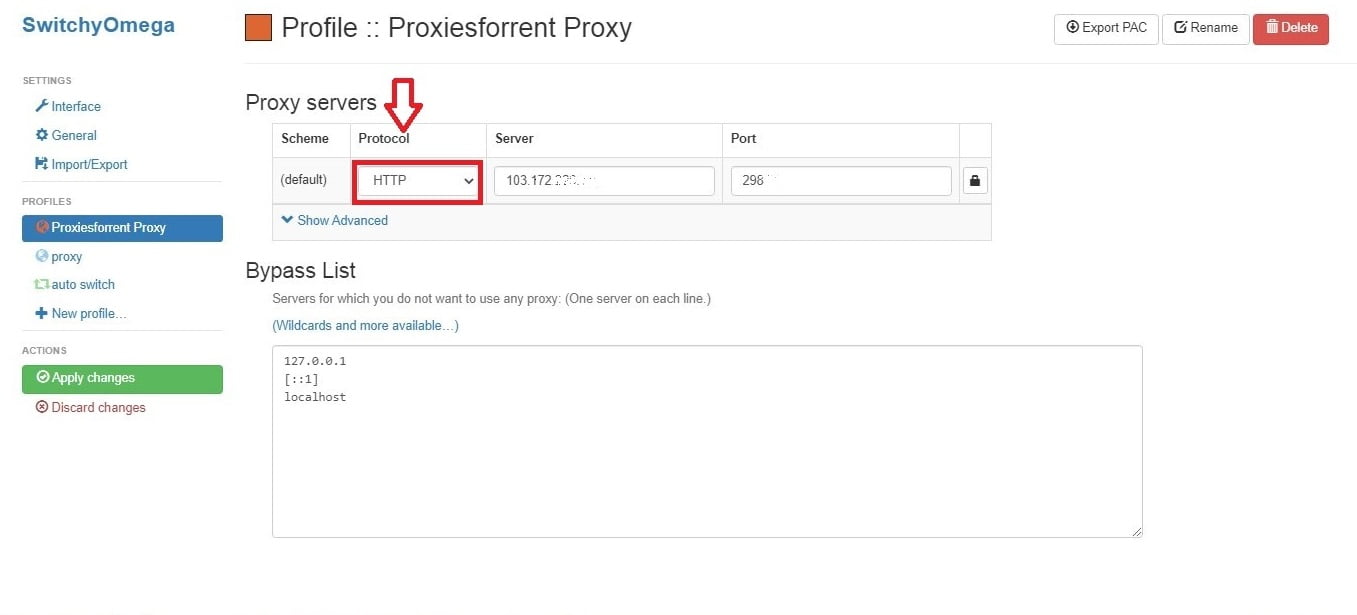
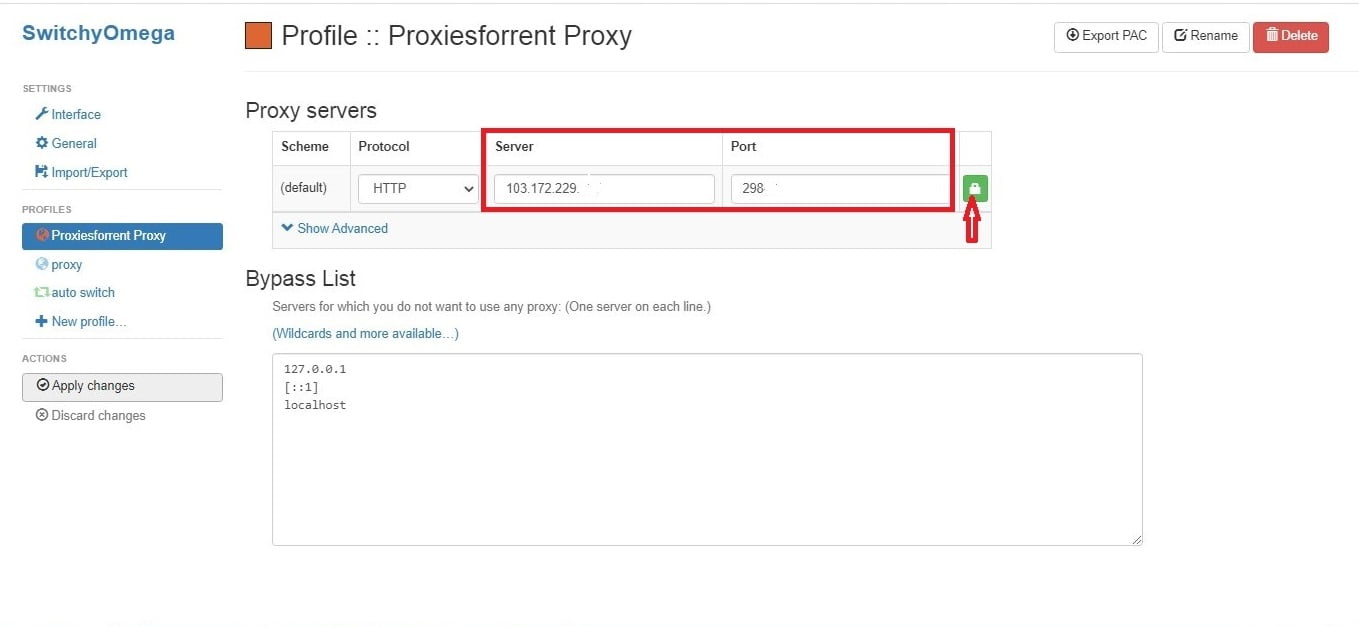
Step 5: Now you can see the proxy servers table select HTTP under the Protocol column. |
Step 6: Fill your details in Server and Port columns. Then click on the lock icon. |
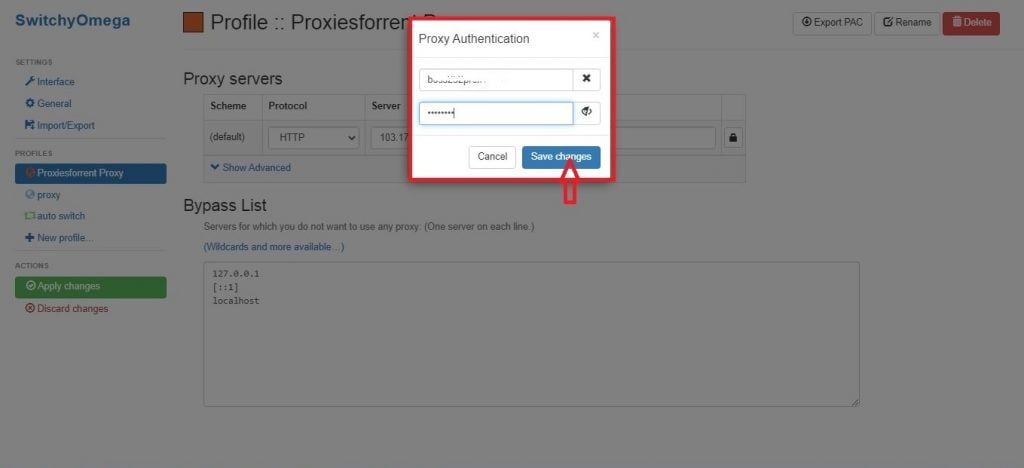
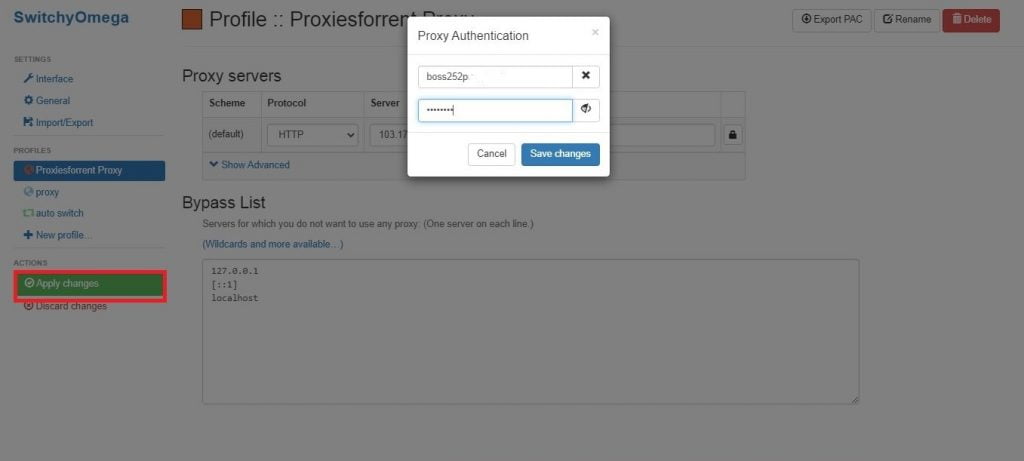
Step 7: Now a popup window will open type your Username and Password and click on the Save changes button. |
Step 8: To apply settings and create a profile for your proxy, click on apply changes option you can see on the left side under actions. |
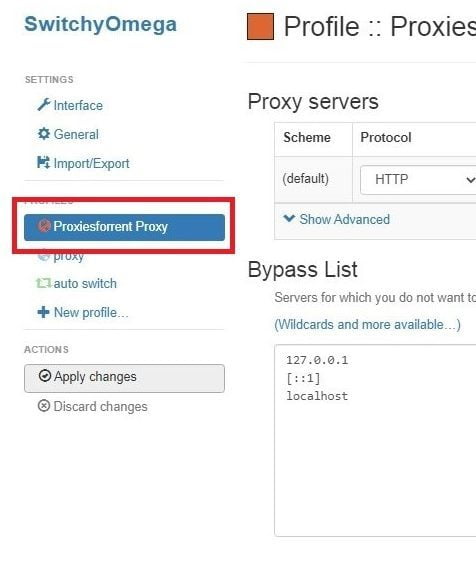
Step 9: Your created profile will appear on the left side of your proxy list as you access SwitchyOmega through the extension icon. Step 10: Check your IP address on google then you can see your IP address is changed. |