Proxy SwitchyOmega is a more advanced, faster, and easier replacement for the “Proxy Settings” box that has been particularly customized for your browser. No more searching through the system settings’ advanced section. No repeatedly filling in and clearing the operating system’s proxy configuring popup. To know more about how to set up a Private proxy switchyomega read our blog on proxiesforrent.
Step 1: Open the Google Chrome Switchyomega extension from here. |
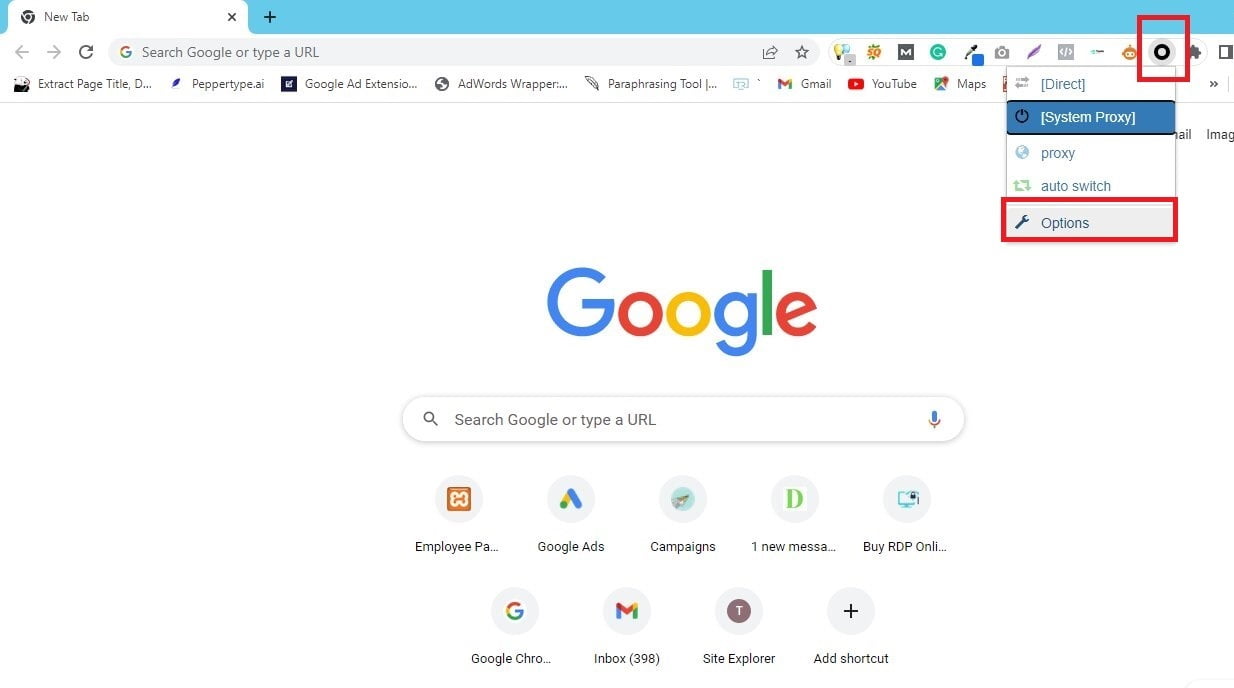
Step 2: Click on the SwitchyOmega icon in your browser and click on Options. |
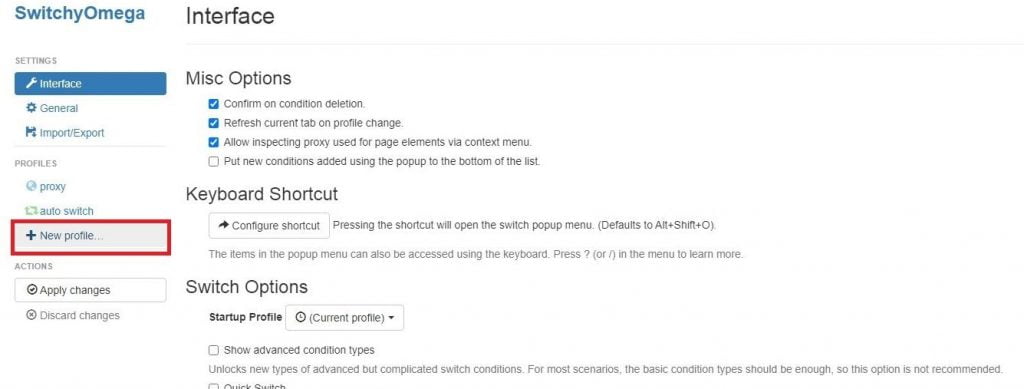
Step 3: Click on the New profile option and create profiles. |
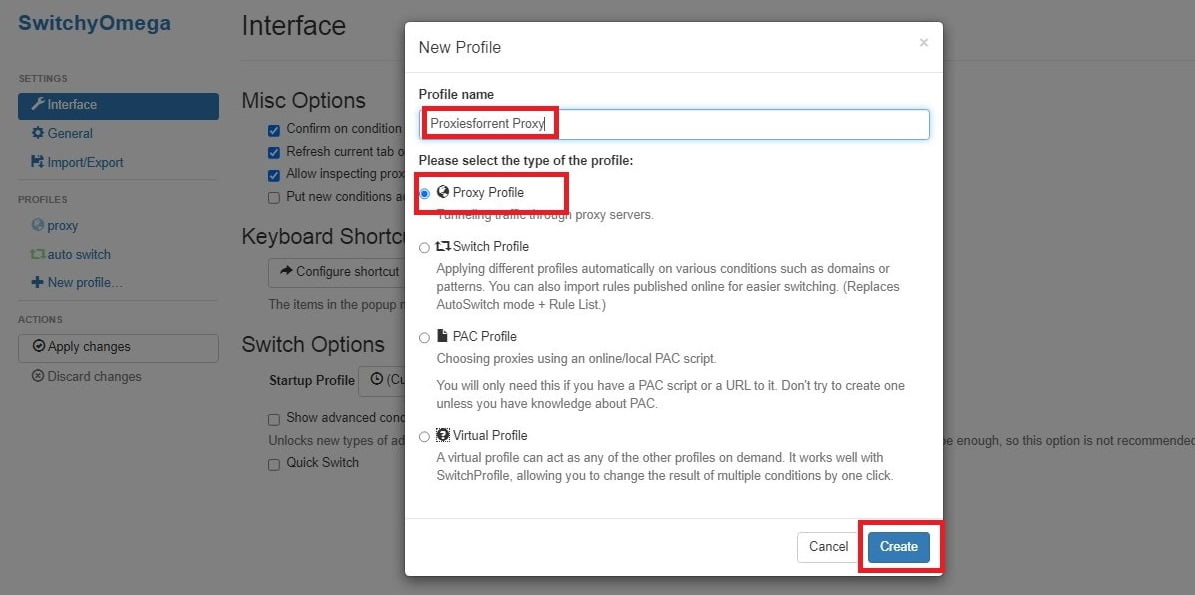
Step 4: Now a popup window will open under Profile name write down the name you want to give. Click on Proxy Profile Option and hit the Create button. |
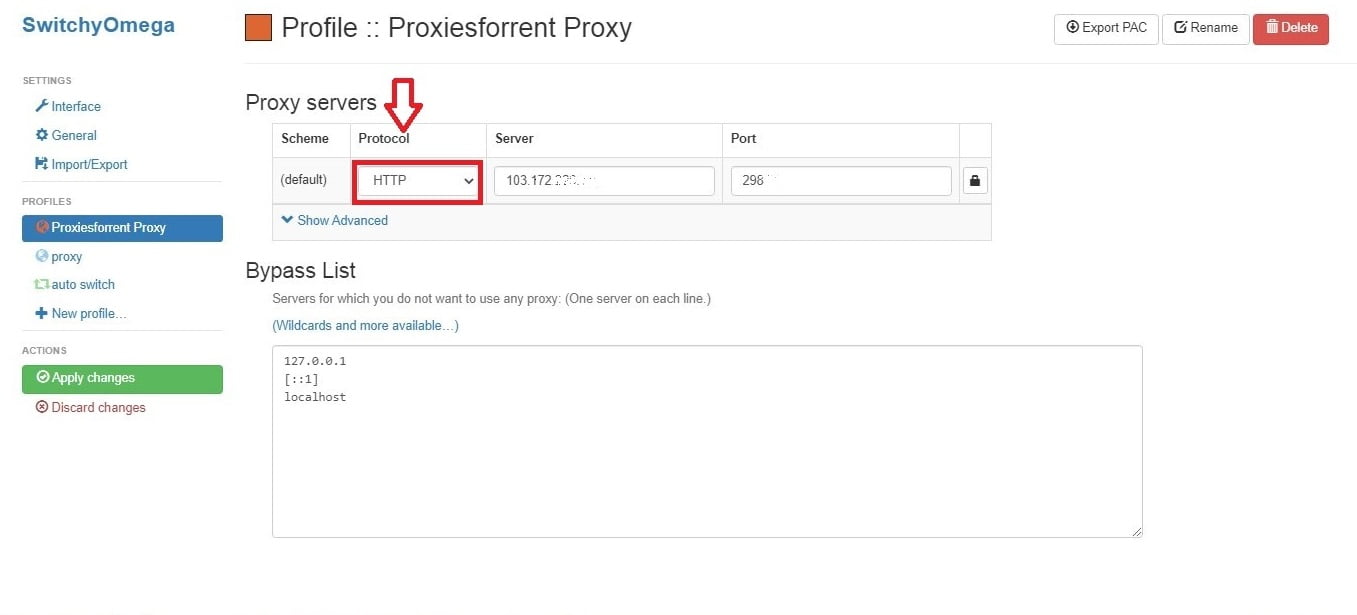
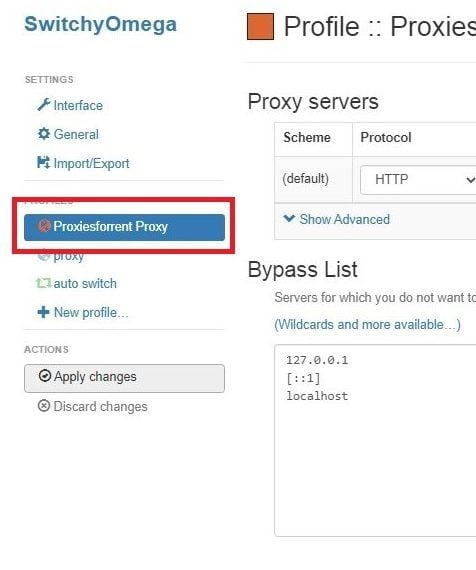
Step 5: Now you can see the proxy servers table select HTTP under the Protocol column. |
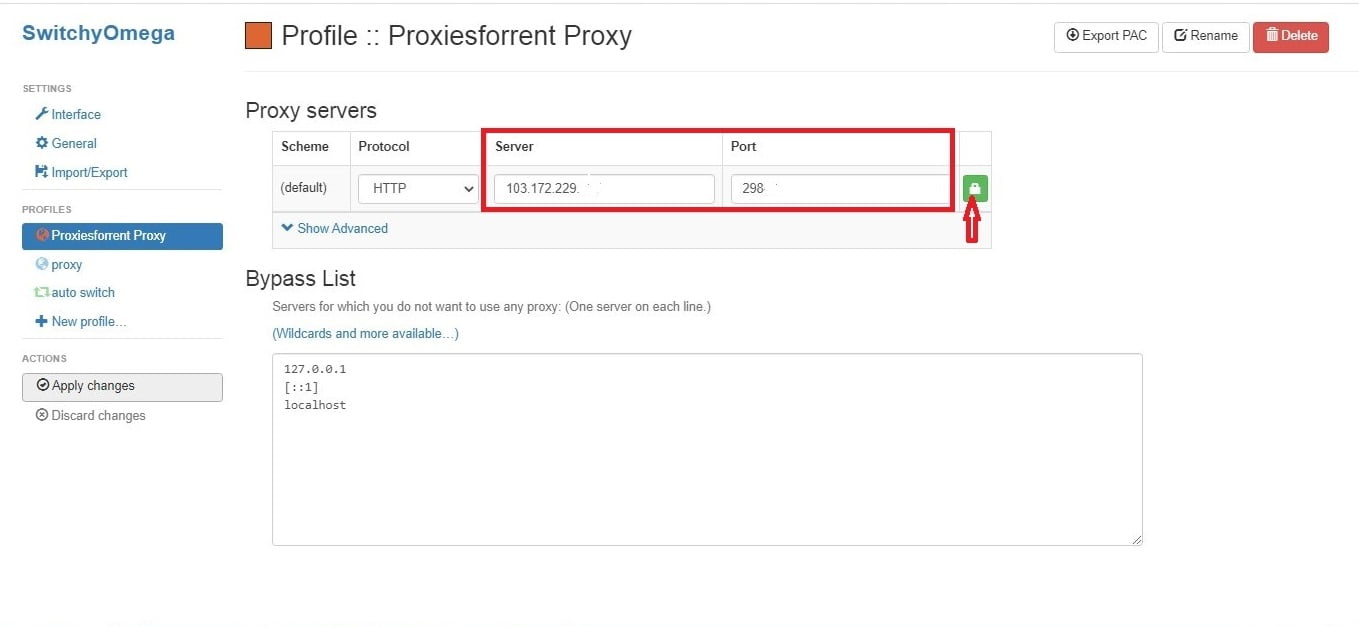
Step 6: Fill your details in Server and Port columns. Then click on the lock icon. |
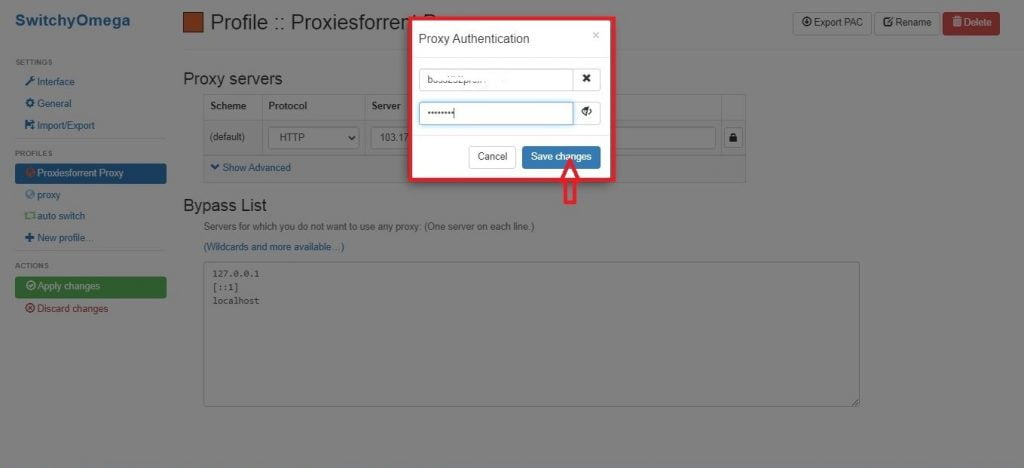
Step 7: Now a popup window will open type your Username and Password and click on the Save changes button. |
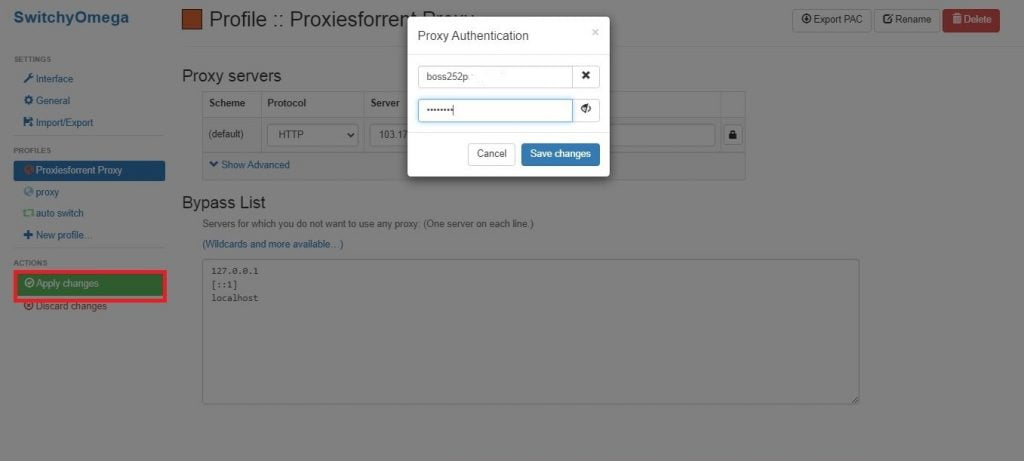
Step 8: To apply settings and create a profile for your proxy, click on apply changes option you can see on the left side under actions. |
Step 9: Your created profile will appear on the left side of your proxy list as you access SwitchyOmega through the extension icon. Step 10: Check your IP address on google then you can see your IP address is changed. |
Step1: Open Google Chrome Switchyomega extension from here
Step2: Click on SwitchyOmega icon in your browser and click on Options.
Step3: Click on the New profile option and create profiles.
Step4: Now a popup window will open under Profile name, write down the name you want to give. Click on Proxy Profile Option and hit the Create button.
Step5: Now you can see proxy servers table select HTTP under Protocol column.
Step6: Fill your details in Server and Port columns. Then click on the lock icon.
Step7: Now a popup window will open, type your Username and Password and click on the Save changes button.
Step8: To apply settings and create a profile for your proxy, click on apply changes option you can see in left side under actions.
Step9: Your created profile will appear in the left side of your proxy list as you access SwitchyOmega through the extension icon.
Step10: Check your IP address on google then you can see your IP address is changed.

Written by
admin